




So for most of your audience, the recording is the webinar.
Why does that matter? Because you can send it to everyone who missed the session, keep it working as a replay long after the event, and watch it back to improve the next one.
But recording isn’t always a one-click job. Get the audio wrong and you’re left with a silent file.
So how do you record a webinar, on any device, for free?
In this article, we’ll cover:
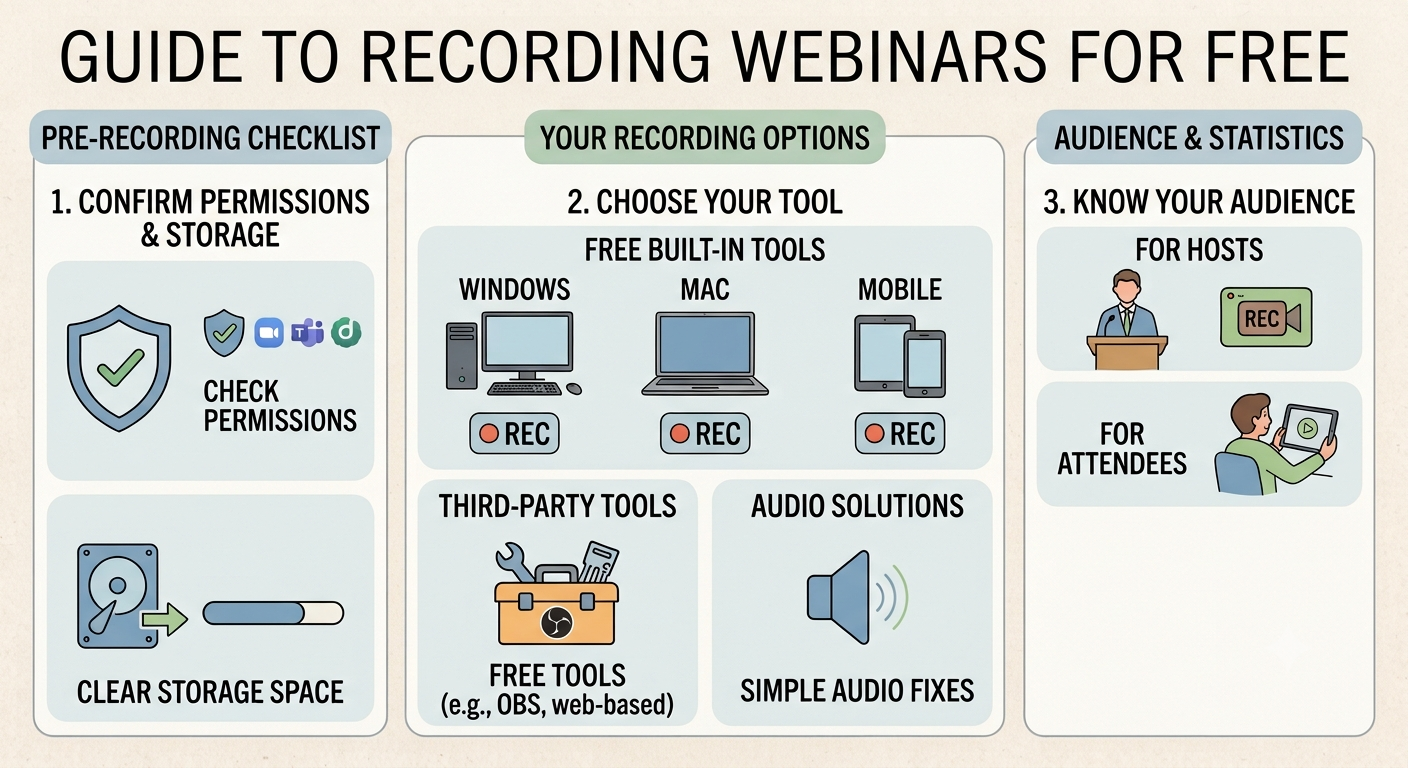
- Permissions to check before you record
- Built-in recorders for Windows, Mac, Chromebook, iPhone, iPad, and Android
- How to record as a host or as an attendee
- Free tools and fixes for audio problems
Check Permissions and Consent Before You Record Online Meetings
Recording rights depend on your role in the session. Hosts and organizers control the platform’s recorder, while attendees usually have no recording controls at all. Most platforms also show a recording indicator to everyone in the session.
The law adds a second layer. In the US, consent rules vary by state, and the Justia 50-state survey on recording conversations shows that some states, California among them, require every party’s consent. California’s rule can apply even when the other person is in a one-party-consent state. When participants join from several locations, the safest approach is to obey the strictest rule that could apply.
This section is general information, not legal advice. If you record sessions with participants in several states or countries, check the rules that apply to you.
Which Free Webinar Recording Method Fits Your Device
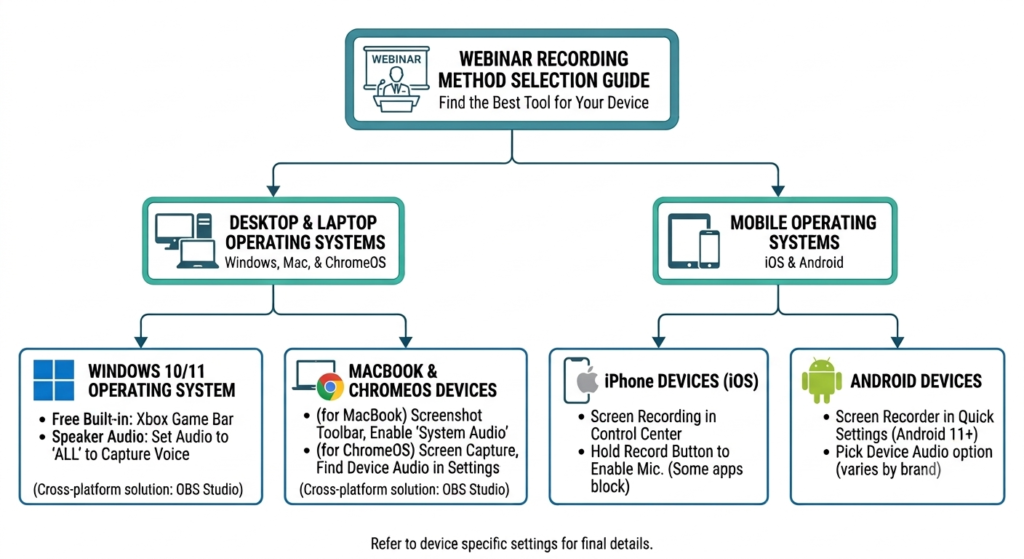
Device | Free built-in option | Speaker audio |
Windows 10 and 11 | Set Game Bar’s audio to All to capture the speaker’s voice. | |
Mac | Choose Include System Audio on macOS 27 or later. On older versions, use OBS Studio 30 or later or BlackHole. | |
Chromebook | Choose Device Audio in the settings. | |
iPhone and iPad | Hold the Record button to add your microphone; some apps block audio capture. | |
Android | Screen recorder in Quick Settings (Android 11 and later) | Pick the device audio option if offered; it varies by brand. |
Windows, Mac, or Linux | Add an audio output capture source for the webinar’s sound. |
How to Record a Webinar as the Host
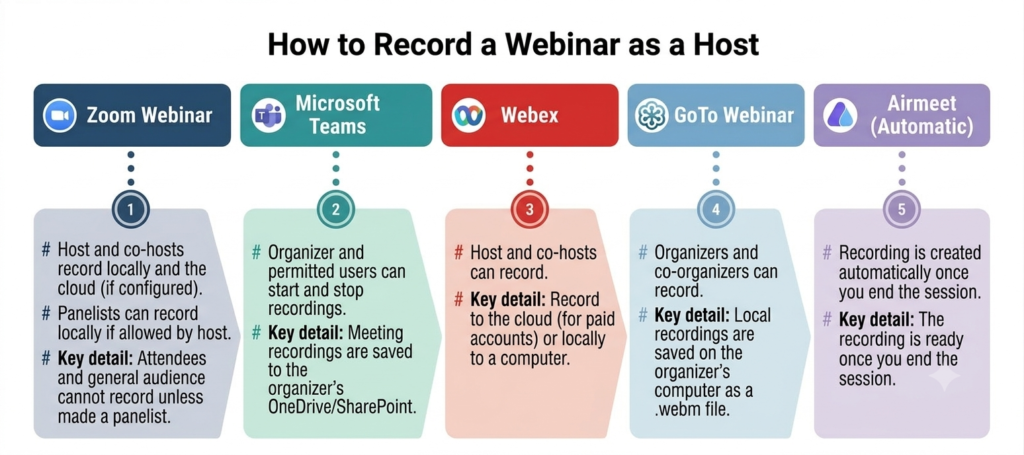
Platform recorders produce the cleanest recording because they capture the stream directly rather than a screen. Each platform has its own permission model, and whether you can record a Zoom webinar for free or use a Webex meeting recorder or GoTo Webinar recording without paying depends on your plan. Check what your account includes before the session starts.
Who Can Record on Each Platform
Platform | Who can record | Key detail |
Host and co-hosts (panelists can record locally if allowed) | Attendees can’t record unless they are made panelists. | |
Organizer and permitted users | Files go to the organizer’s OneDrive or SharePoint. | |
Host and co-host | Cloud recording needs a paid account. | |
Organizers and co-organizers | Local recordings are saved as WEBM. | |
Created automatically | The recording is ready once you end the session. |
How to Record a Zoom Webinar
Hosts and co-hosts can record to the cloud or to a computer. Panelists can record to a computer too, unless the host turns that off, as Zoom’s webinar roles guide explains. Attendees get no recording at all, so anyone who needs a copy has to be promoted to panelist first. Recording to a computer works on free and paid accounts, and Zoom’s computer recording guide shows how to start it.
How to Record a Microsoft Teams Webinar
Recording is controlled by policy and by the organizer. According to Microsoft’s cloud recording documentation, both the organizer and the person who starts the recording need permission to record. Anonymous users and people outside the organizer’s organization can’t start a recording, and files are stored in the organizer’s OneDrive or SharePoint, as Microsoft’s recording support page confirms.
How to Record a Webex Session
Hosts can start recording by clicking “Record” in the session. Webex’s help page says hosts and co-hosts on a paid Webex account can record meetings and webinars in the cloud, while attendees can’t record themselves. Cloud recordings save as MP4 files to your Webex site, and the host receives an email with the details.
How to Record a GoTo Webinar
Organizers and co-organizers can record. Online recording works from the desktop app or the web, but local recordings require the desktop app and are saved as WEBM files, which you may need to convert, as GoTo’s recording guide explains.
How to Record an Airmeet Event
Airmeet records your session automatically, and the file is generated once you mark the session as ended. Pausing won’t do it, according to Airmeet’s recording help article. Anything said backstage stays off the recording. Quality defaults to 720p, so if you want 1080p, switch it on in the session settings before the session starts, as Airmeet’s 1080p guide describes.
Keep a Backup Recording Running
On any platform, keep a second recording running. GoTo recommends adding a second organizer to the webinar. Both can record, so a technical problem for one person doesn’t leave you without a recording, and Airmeet’s guide to webinar recording and distribution software advises recording locally as a backup alongside the cloud copy.
How to Record a Webinar as an Attendee (Without Being the Host)
Recording a webinar as an attendee depends on what the host permits, because platforms keep the recorder with hosts and presenters. Zoom and Webex both say attendees can’t record, and Teams leaves it to whatever the organizer allows.
The easiest fix is to ask the organizer for the replay. Many hosts send it to registrants afterward, and platforms like GoTo Webinar and Airmeet have built-in ways to share it. If you need to record live, ask the host for a role with recording rights: panelist on Zoom, co-host on Webex, or a recording permission the organizer can extend to presenters on Teams.
If the host doesn’t offer a replay and you want a personal copy for notes, get permission first, then use your device’s screen capture tool. That is how to record a webinar as an attendee for free.
How to Record a Webinar on a PC (Windows 10 and 11)
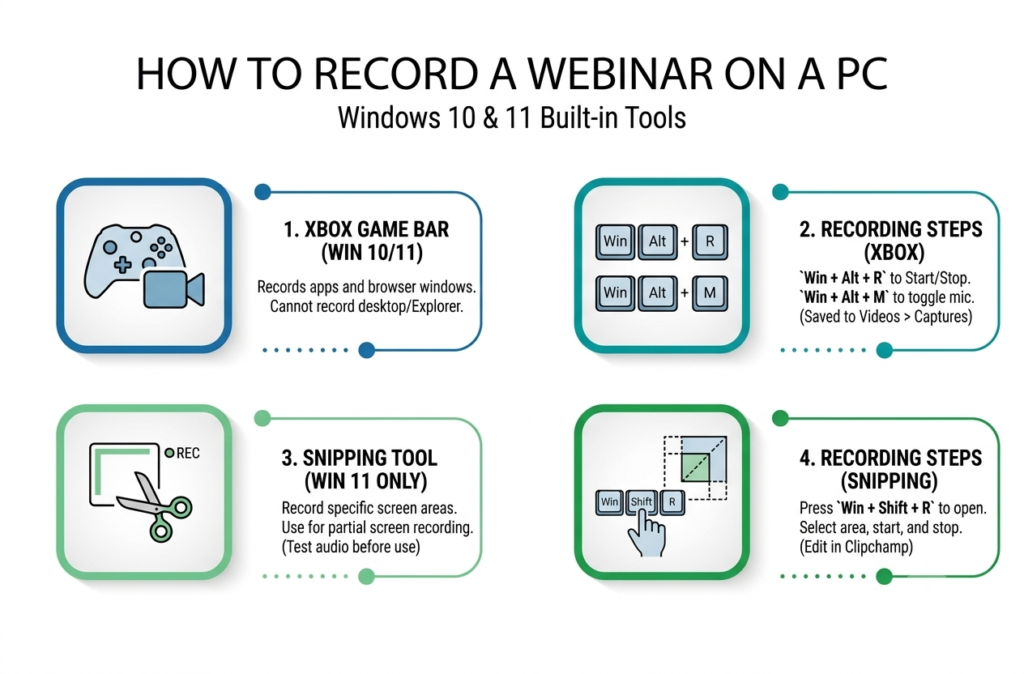
Windows includes two built-in screen recorders, so you can record a webinar on a PC without paid software. Xbox Game Bar works on both Windows 10 and 11, while Snipping Tool is available on Windows 11 only.
Xbox Game Bar (Windows 10 and 11)
Xbox Game Bar records most apps and browser windows, despite the gaming name. Open the webinar in a browser or app window first, because Game Bar cannot record the Windows desktop or File Explorer.
- Press Windows + G to open Game Bar, or press Windows + Alt + R to start recording directly.
- Press Windows + Alt + M to switch your microphone on or off.
- Press Windows + Alt + R again to stop.
Recordings usually go to Videos > Captures. If your voice is missing, open Settings, go to Privacy, then Microphone, and allow access for Xbox Game Bar.
Snipping Tool (Windows 11 Only)
Snipping Tool is the Windows 11 option when you want to record only part of the screen. Microsoft’s instructions are as follows:
- Press Windows + Shift + R.
- Select the area you want to record.
- Start and stop the recording.
From there, you can open the clip in Clipchamp to trim it or add captions. Audio behavior has differed across Windows builds, so test it before a full session.
How to Record a Webinar on a Mac (MacBook)
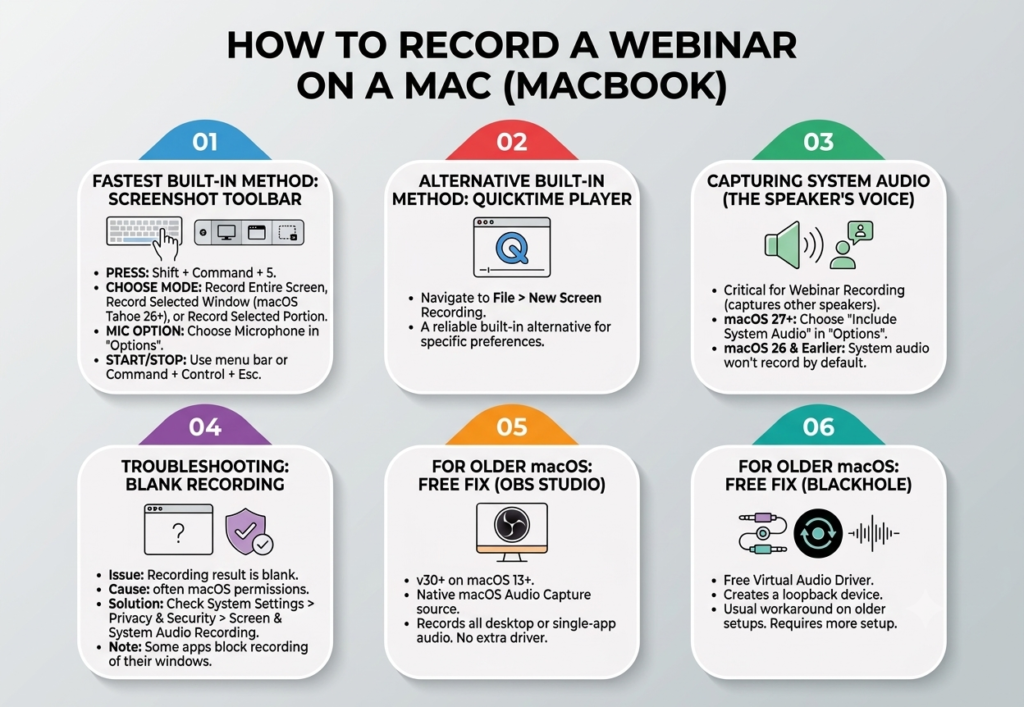
The Screenshot toolbar is the fastest built-in route.
- Press Shift + Command + 5.
- Choose Record Entire Screen, Record Selected Window (macOS Tahoe 26 or later), or Record Selected Portion.
- Open Options and choose a microphone to add your voice.
- Start the recording. To stop, use the menu bar or press Command + Control + Esc.
QuickTime Player (File > New Screen Recording) is an alternative.
Apple’s guide to recording the Mac screen says that on macOS 27 or later, you can also choose Include System Audio in Options to capture the sound your Mac is playing. In a webinar, that is the speaker’s voice. For earlier versions, refer to the audio options below.
If a recording comes back blank, the cause is usually macOS’s own permissions, not the host’s. Apple lets you control which apps can record the screen and system audio under System Settings > Privacy & Security > Screen & System Audio Recording, so check that setting first. Some apps also do not allow their windows to be recorded.
Mac Internal Audio Screen Recorder Options for Older macOS Versions (Free)
On macOS 26 and earlier, Apple’s recorders capture the microphone only, so the speaker’s voice will be silent without extra help. There are two free fixes:
- OBS Studio 30 or later on macOS 13 or newer has a native macOS Audio Capture source that records all desktop audio or a single application, with no extra driver.
- BlackHole, a free virtual audio driver, creates a loopback device that QuickTime or any recorder can use as an input. It is the usual workaround on older setups, though it takes more setup.
How to Record a Webinar on a Chromebook
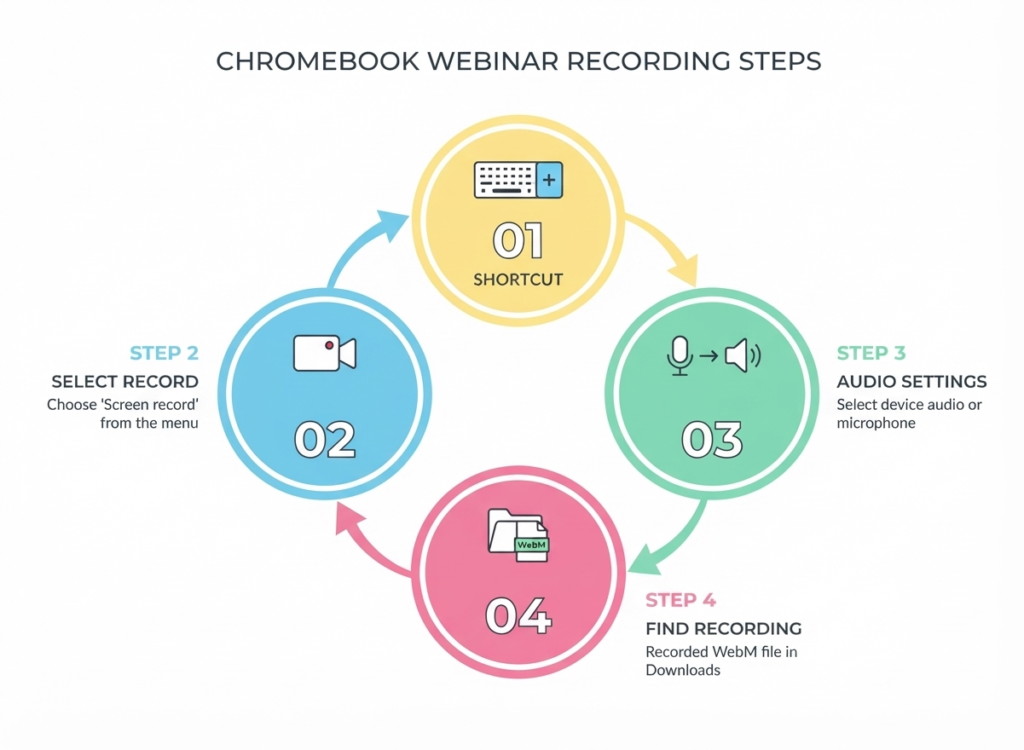
Chromebooks include a screen capture tool that handles device audio. According to Google’s Chromebook help page, press Shift + Ctrl + Show windows (or Ctrl + Shift + F5 on an external keyboard), select Screen record, then choose full screen, a partial area, or a window. In the settings, pick Device audio to capture the speaker, microphone for your voice, or both. Recordings save to the Downloads folder unless you change the location.
Choose a video recording rather than a GIF, because GIFs do not capture audio, as Google notes. Partial-screen video saves as WebM, so check that the recipient’s player can open it before you share the file.
How to Record a Webinar on iPhone or iPad
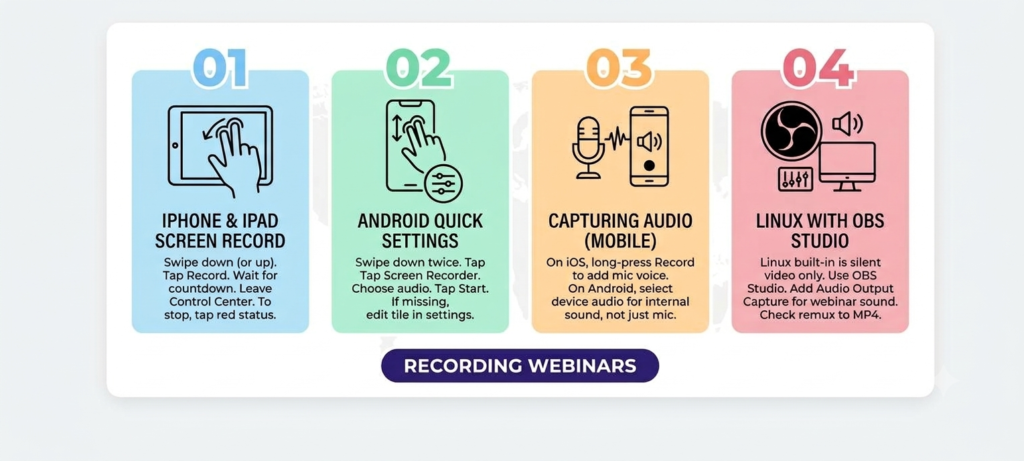
iPhone and iPad screen recordings live in Control Center. Apple’s instructions are to swipe down from the top-right corner (or up from the bottom edge on older models), tap the grey Record button, wait for the three-second countdown, then leave Control Center. To stop, tap the red status indicator and confirm. Recordings are saved in Photos. If the button is missing, add it under Settings > Control Center.
For audio, press and hold the Record button and switch the microphone on if you want to add your voice. Apple notes that some apps block audio or video capture and that you cannot record the screen while screen mirroring. A black screen with sound usually means the app is protecting its content.
How to Record a Webinar on Android (Including Internal Audio)
Android 11 and later versions include a screen recorder in Quick Settings. Google’s help page says to swipe down twice, tap Screen Recorder, choose whether to record audio, and then tap Start. If the tile is missing, tap Edit and drag it into place. Files appear in Google Photos under Collections > On this device > Movies, or in the Gallery app on other brands.
For internal audio, look for a device audio option in the audio menu, because microphone-only recording will capture the room instead of the webinar. Wording and options differ by manufacturer, and some apps block internal audio capture. On a work-managed phone, an administrator can also block screen capture, so a failed recording is not always a missed setting. A short test clip settles it before the session starts.
How to Record a Webinar on Linux
Linux has no built-in recorder that reliably captures the webinar’s sound, so OBS Studio is the practical choice. GNOME’s built-in screen recorder (Ctrl + Alt + Shift + R) records video only, so use it just when you need a silent capture. For the speaker’s audio, add an audio output capture source in OBS so the webinar’s sound is recorded along with the video.
Free Tools for Long Webinars: OBS Studio, VLC, and Chrome Extensions
OBS Studio
OBS Studio is the best free screen recorder for long videos, and it is the open-source option with no recording time limit or watermark. It runs on Windows, macOS, and Linux, so it is also the free route for Linux users.
To set it up:
- On first launch, run the Auto-Configuration Wizard and choose the option for recording.
- Add a Window Capture or Display Capture source for video.
- Add an audio input capture source for your microphone.
- Add an audio output capture source for the webinar’s sound.
If a browser window appears black, turn off hardware acceleration in the browser. On Linux, the capture sources you see can depend on your desktop setup, so check a saved test clip.
OBS’s recording output guide also recommends recording in MKV, which survives crashes, then remuxing to MP4 through File > Remux Recordings without quality loss. The OBS knowledge base explains scenes and sources in more depth.
VLC
VLC can capture the desktop through Media > Open Capture Device, but it does not record sound in desktop mode. Use it only when you need a silent screen capture.
Chrome Extensions
Chrome extensions suit browser-based webinars because they can record a single tab with tab audio. Free tiers vary widely. As of August 2026:
- Loom’s free plan caps recordings at five minutes.
- Screencastify’s free plan caps recordings at 30 minutes and adds a watermark.
- Screenity is listed with no watermark or time limit.
Check an extension’s permissions and privacy policy before installing it.
Audio Output Settings That Decide Recording Quality
Most failed recordings are due to audio routing rather than video. These settings account for the majority of problems:
- Choose the right sources. Capture system audio (the speaker’s voice) and microphone input separately, then confirm both meters move before you start.
- Set Game Bar’s audio scope. Under the Game Bar audio settings, choose All to record every system sound, while Game records only the selected app.
- Use headphones. Speakers feeding a microphone create echo that is hard to remove later.
- Control the room. Airmeet’s guide to using webinar recordings recommends a quiet space, noise-canceling microphones, and a balance check between system audio and microphone levels.
- Record on separate tracks where possible. OBS can split microphone and desktop audio into separate tracks, so you can lower background noise without touching the speaker’s voice.
To record webinar audio without microphone noise, skip the microphone entirely when you only need the speaker. Capture system audio alone using Game Bar’s All setting, OBS’s Audio Output Capture, the Chromebook’s Device audio option, or, on macOS 27 or later, Include System Audio.
Test the Saved File Before the Real Session
Live audio meters show that sound is arriving, not that it reached the file. Before the session, record a 20-to-30-second clip with the same headphones, browser, and webinar app you plan to use, stop it, and play the saved file in a separate player. Check three things:
- Slide text is readable at the size you will present or watch.
- The presenter’s voice is audible and in sync with the picture.
- Your own microphone is present only if you intended it.
Close private tabs, silence notifications, connect power, and check free storage before the real session starts.
Fixing Common Recording Problems
- Black video with sound: The app or browser is blocking capture. Turn off hardware acceleration or switch from Window Capture to Display Capture.
- Webinar recording silent (no sound at all): The recorder is set to the microphone only, or the app has no permission to capture audio.
- Your voice is missing: Check the microphone privacy permission in Windows or macOS.
- Your voice is doubled: More than one source is recording the same microphone. Disable the duplicate.
- Recording stops partway through: Free disk space and battery are the usual causes. Check both before a long session.
- Unusual file type: GoTo’s local files are WEBM, Chromebook partial-screen recordings save as WebM, and OBS defaults to MKV. Convert or remux them before editing.
Save and Organize Your Webinar Recordings
A recording becomes useful when it is easy to find again. To save a webinar recording to watch later, rename the file with the webinar title and date, keep the untouched original, and make any trimmed copy from it. A small digital presentation archive, with one folder per event and a backup in a second location, prevents the most common loss, which is a file left in a temporary folder.
If you are the organizer, a recording also works as an evergreen asset, and Airmeet’s guide to on-demand webinars explains how to turn a recorded session into a replay that registrants can watch on their own schedule.
Conclusion: Recording Webinars on Any Device
Recording a webinar well involves three decisions: whether you have permission, which method matches your role and device, and how audio will be captured. Hosts get the best results from the platform’s own recorder plus a local backup. Attendees should ask for the replay first and fall back on a built-in screen capture tool or OBS Studio only with the host’s consent. Test the saved file with a short clip before the real session, because audio routing is where most recordings fail.
FAQs:
A built-in tool is the quickest route. Windows 11 includes Xbox Game Bar and Snipping Tool, macOS includes the Shift + Command + 5 toolbar, Chromebooks have a Screen record option, and iPhone and Android have recorders in their control panels. Check that audio is captured, because system audio is the part that most often needs extra setup.
Screen recorders run outside the webinar platform, so the platform may not flag them. That does not make covert recording acceptable. It can breach consent laws, the webinar’s terms and the host’s rules, and the safe route is to ask the host for permission.
OBS Studio is the strongest choice. It has no time limit or watermark, records microphone and desktop audio on separate tracks, and saves in a crash-safe format you can convert to MP4 afterward.
On macOS 27 or later, choose Include System Audio in the Screenshot toolbar options. On earlier versions, use OBS Studio 30 or later with its macOS Audio Capture source, or route sound through a virtual audio device such as BlackHole.
File size depends on duration, resolution, and recorder settings. Record a five-minute sample, check its size, and multiply by the planned length divided by five, then add headroom for overruns and backup copies. Treat the result as an estimate, since content with more motion produces larger files.
A screen recorder only captures what plays on your screen while you run it, so an ended session needs an existing recording. Ask the organizer for the replay, the slides, or any session notes, and check whether the replay link expires.
Only if the organizer allows it. Having access to a session does not mean you can pass it on. Ask whether colleagues may receive the file or whether the official replay link is preferred. For sensitive material, confirm who should receive it and where it will be stored before you send anything.
On-screen captions appear in the video only if they are visible in the capture area, and a screen recording does not produce a separate caption file. If accessibility matters, ask the organizer for a transcript.