Turn every signup into a controlled, brand-right path to your webinar.
Customize what you collect, decide who gets in, and protect event capacity from the Registrations tab without stitching together a separate approval workflow.
Unchecked registration can overfill limited experiences. Manual lists, inconsistent entry rules, and last-minute attendee verification leave marketing teams fixing access issues when they should be preparing sales follow-up.
The Solution
Capture The Right Signals. Control Every Path To Entry
Build a tailored form with preset or custom fields, then apply registration access settings from the event dashboard. Enable Waitlist Mode when approval matters, define entry requirements such as sign-in or unique invitations, and use capacity controls where the event format supports them.
The result is a cleaner audience, a smoother arrival experience, and richer context for post-webinar action.
Use Case
Built For Every High-Intent Event Motion
Demand generation webinars
Collect role, company, and interest signals that help sales prioritize follow-up.
Executive roundtables
Use approvals and controlled entry to protect a curated, high-value room.
In-person field events
Where supported, automatically close registration at the capacity you set.
Customer education
Capture customer context and guide attendees into the right training sessions.
Partner events
Standardize registration while keeping access aligned to invited audiences.
Multi-session programs
Use consistent registration data to improve segmentation and nurture strategy.
Product Screenshots
Step-By-Step Process: How To Manage Event Registrations
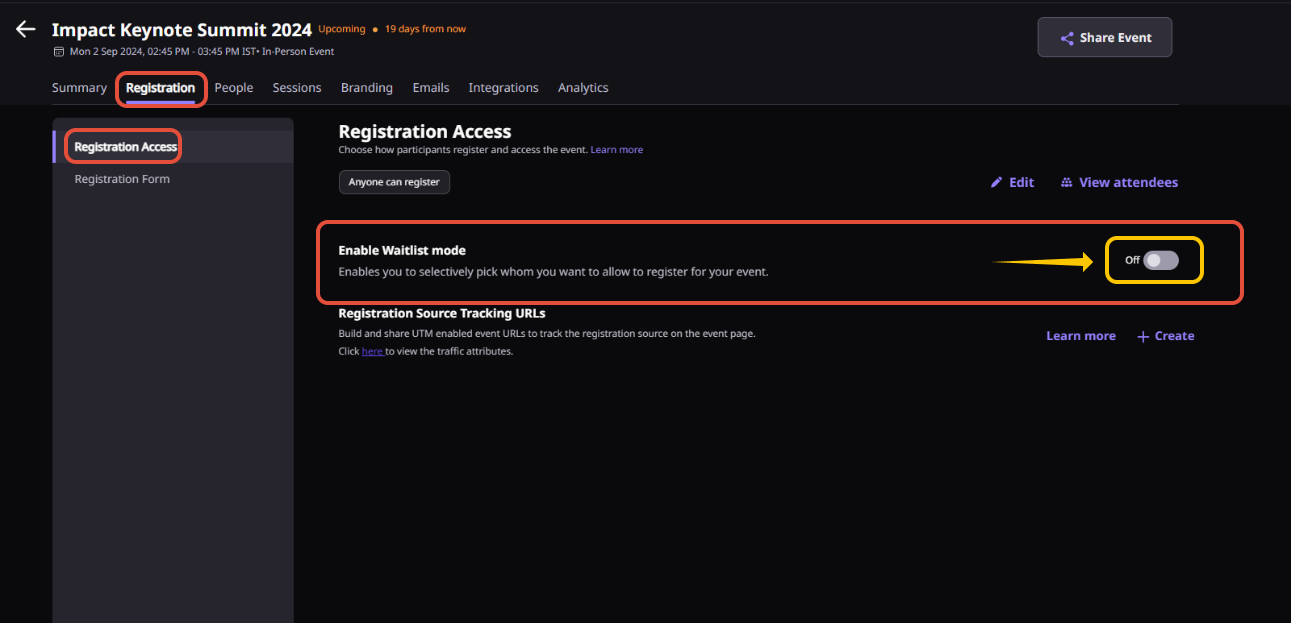
Step 1. Open your event dashboard and select Registrations.
Step 2. Customize the registration form by adding standard or custom fields that collect the information you need.
Step 3. Choose your registration access settings, such as sign-in requirements, invitation rules, or open registration.
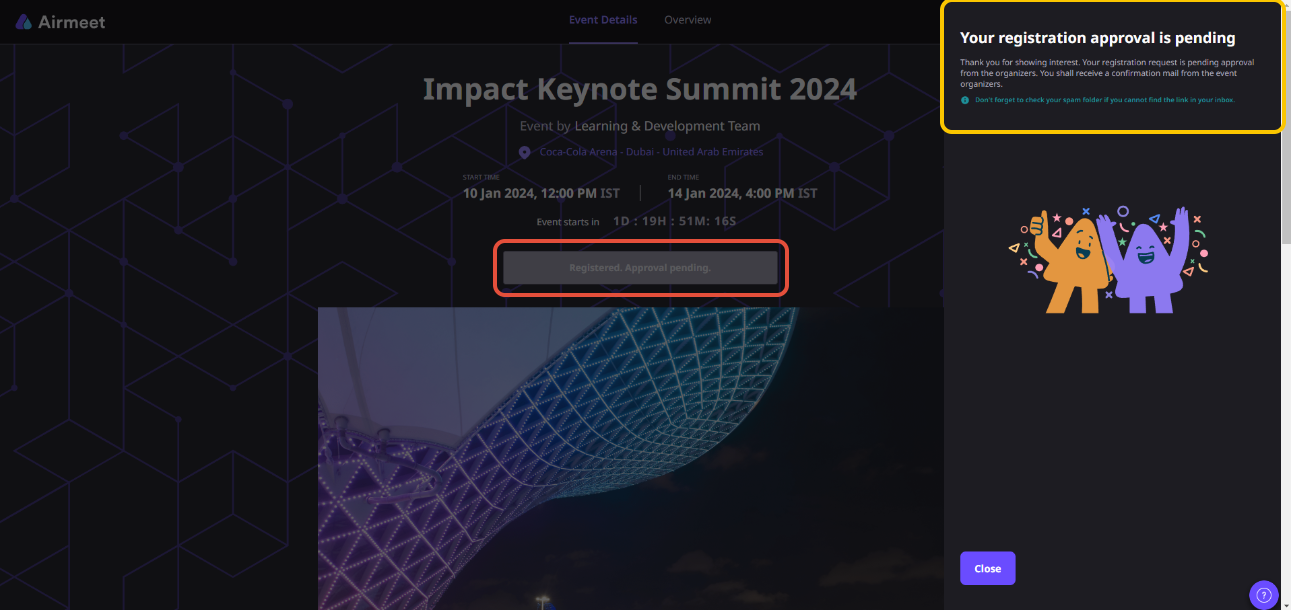
Step 4. Enable Waitlist Mode if you want registrations to be reviewed before attendees are approved.
Step 5. Set registration limits for supported in-person events so that registration closes automatically when capacity is reached.
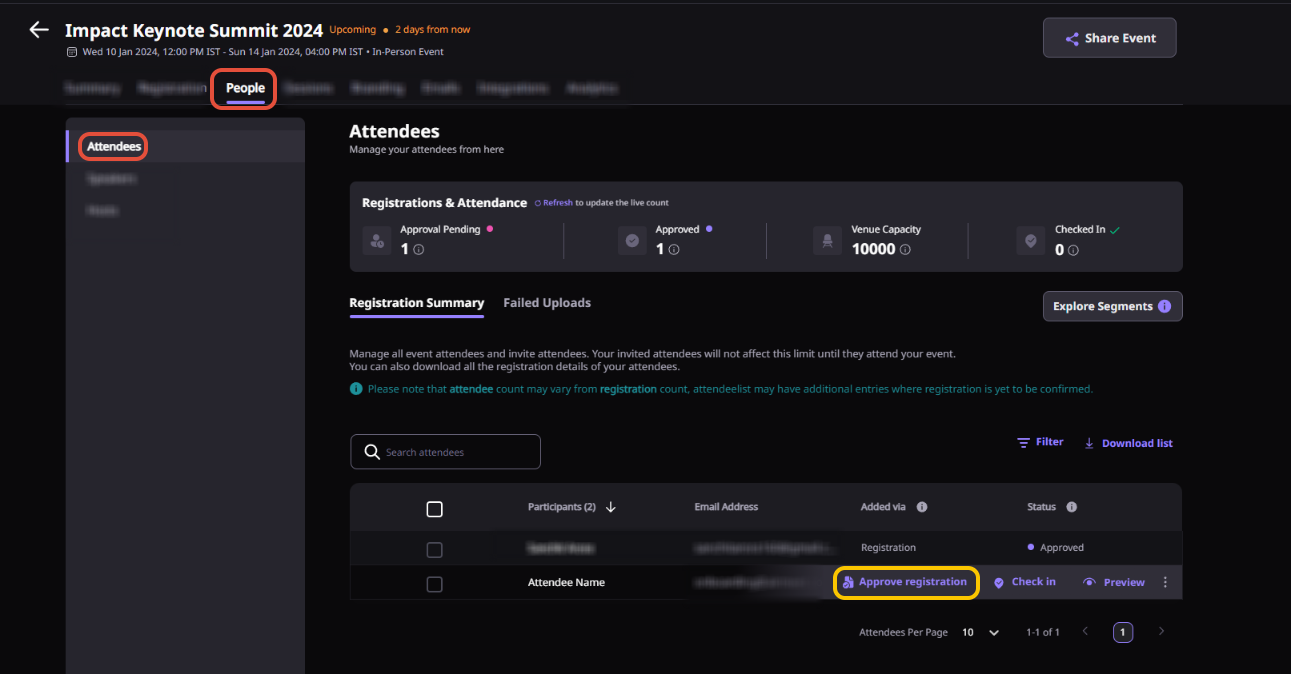
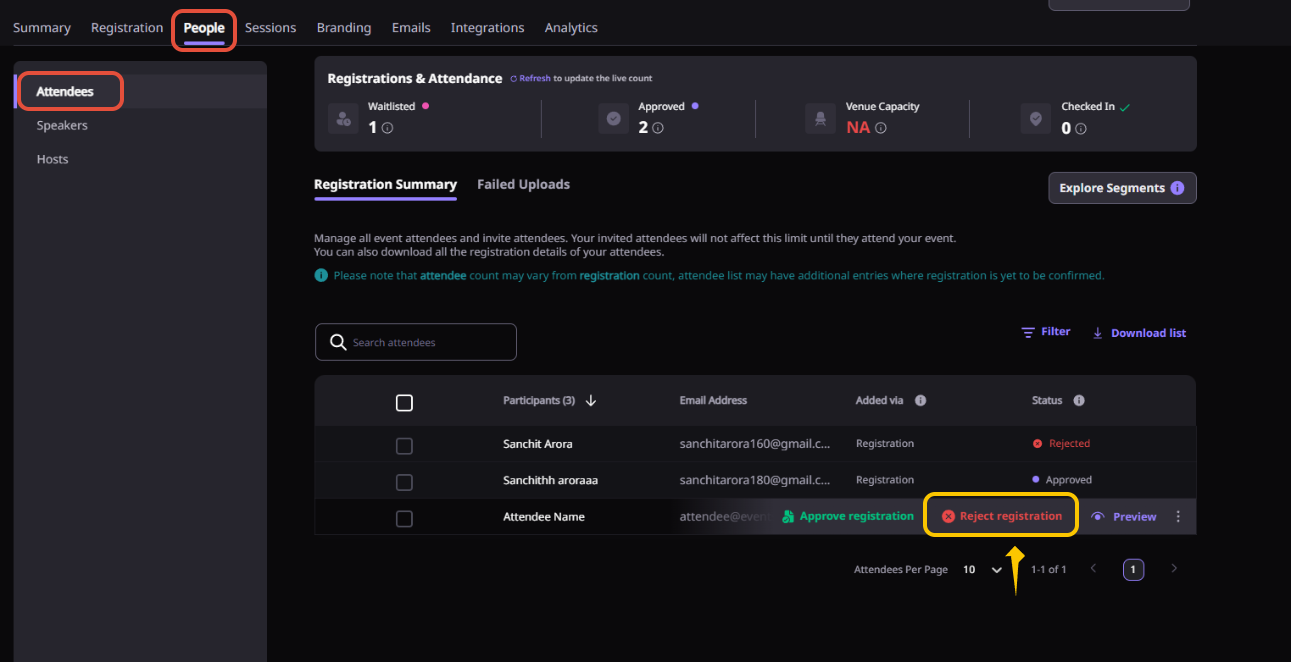
Step 6. Review registrations from the attendee list, approve or reject pending requests if applicable, and download registration data for follow-up.
Why Airmeet
Why B2b Webinar Teams Choose Airmeet Registration Management
Registration is built into the event experience, so forms, attendee access, approvals, and participant data are managed from one place instead of across multiple tools.
This approach reduces operational risk while preserving the context that revenue teams need to prioritize outreach.
help Center
Relevant Help Articles
Explore guides and tutorials to help you create, customize, and host exceptional events on Airmeet.
You’ll find all registration controls in the Registrations section of your event dashboard. From there, you can customize your registration form, manage registration access, and adjust other attendee entry settings.
Yes. You can tailor your registration form by using standard fields or adding custom ones, including short and long text, single- and multi-select options, consent checkboxes, and file uploads.
Airmeet currently supports up to 50 fields on a registration form. If you are displaying registration details on attendee cards, you can show up to 5 fields, including the required name field.
Waitlist Mode lets you review registrations before granting access. New registrants are placed in a pending list, where you can approve or reject them. Airmeet automatically notifies attendees of your decision by email.
Yes, for in-person events. You can enable Auto-close Registrations to automatically stop new registrations once your attendee limit has been reached. This feature isn’t currently available for virtual or hybrid events.
Once capacity is reached, the registration form closes and the event landing page shows that registrations are closed. Additional attendees can’t be added through CSV imports or APIs unless you increase the capacity.
Yes. For supported in-person events, you can increase or adjust the capacity at any time. If additional seats become available, registration can reopen automatically.
Yes. Airmeet supports different registration and event-entry methods, including sign-in requirements and unique invitation links, so you can choose the level of access that best fits your event.
“I was really excited to see how alive Airmeet seemed. The first time I raised my virtual hand to ask a question, I was brought up on stage, my camera flipped on, and I was able to talk with the presenters, that was the sold-moment in my head! That is what I wanted. We weren't going to be speaking at our audience. We wanted a two-way engagement. With the analytics in the background, that was my “Aha moment!”
Victoria YounesExecutive Events Manager
Incredible Companies Use Airmeet
Most loved Virtual Events Platform
“I was really excited to see how alive Airmeet seemed. The first time I raised my virtual hand to ask a question, I was brought up on stage, my camera flipped on, and I was able to talk with the presenters, that was the sold-moment in my head! That is what I wanted. We weren't going to be speaking at our audience. We wanted a two-way engagement. With the analytics in the background, that was my “Aha moment!”
Victoria YounesExecutive Events Manager
Incredible Companies Use Airmeet
Most loved Virtual Events Platform
“I was really excited to see how alive Airmeet seemed. The first time I raised my virtual hand to ask a question, I was brought up on stage, my camera flipped on, and I was able to talk with the presenters, that was the sold-moment in my head! That is what I wanted. We weren't going to be speaking at our audience. We wanted a two-way engagement. With the analytics in the background, that was my “Aha moment!”
Victoria YounesExecutive Events Manager
Incredible Companies Use Airmeet
Most loved Virtual Events Platform
“I was really excited to see how alive Airmeet seemed. The first time I raised my virtual hand to ask a question, I was brought up on stage, my camera flipped on, and I was able to talk with the presenters, that was the sold-moment in my head! That is what I wanted. We weren't going to be speaking at our audience. We wanted a two-way engagement. With the analytics in the background, that was my “Aha moment!”